Hull
Manual Sign in Apply for beta access
Closed beta · invite only

Design a boat hull, from a few answers to a CAD file.

Hull runs in your browser. Answer a handful of plain questions — how long, how fast, how deep a V — and it generates a real hull you can open, pull apart and refine. Every number you see comes from an actual hydrostatic integration of your shape, not a lookup table. When you are happy with it, export a solid model, a wireframe, or a table of offsets to loft from.

The manual is public and complete — read it before you apply. No account needed.
the new-project wizard
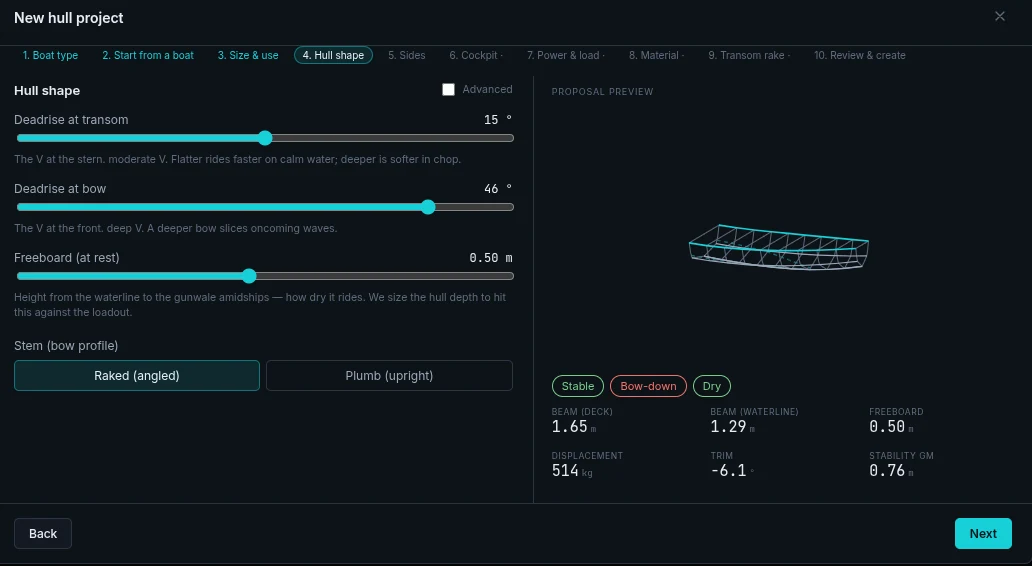
The new-project wizard on the Hull shape step: sliders for deadrise at transom, deadrise at bow and freeboard at rest, a raked or plumb stem choice, and a proposal preview panel showing the generated hull with Stable, Bow-down and Dry verdict chips over its beam, displacement, trim and GM.
The wizard, step 4. Move a slider and the proposal beside it is regenerated and re-floated — shape, numbers and the plain-language verdicts, including the ones that disagree with you.

One screen, four views, one hull

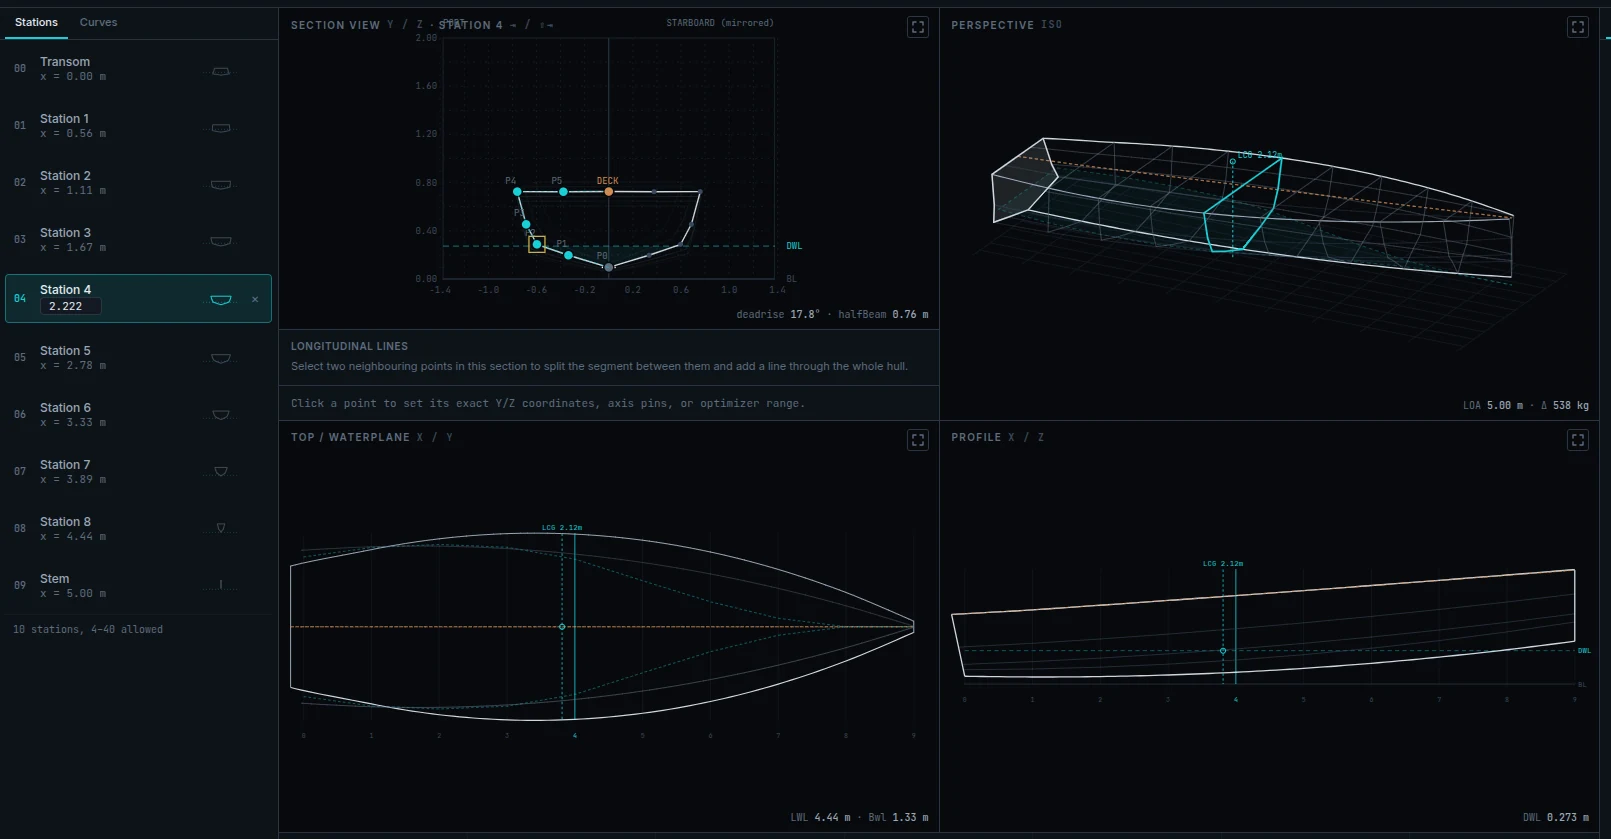
The design lab keeps the section editor, the 3D perspective, the waterplane and the profile in sync. Drag a control point in one and the other three redraw, along with the waterline, the centres and the displacement.

The design lab
The Hull design lab: a station list down the left from Transom to Stem, a section editor with numbered control points and the design waterline, an isometric perspective of the hull with its waterplane, and a top and profile view below, each marked with the longitudinal centre of gravity.
Ten stations, seven named lines. Each point can be dragged, pinned on one axis, or given a range the optimiser must stay inside. The readouts under each view are live: deadrise and half beam per section, LWL and BWL on the waterplane, the DWL on the profile.

What you can do in Hull

Six things, in the order you meet them. Each one has a chapter in the public manual, so you can read exactly how it behaves before you ever sign in.

Start

A wizard, not a blank canvas

Boat type, a starting boat, then length, beam, speed and how deep a V you want. The panel beside it redraws as you go and tells you in plain words whether the boat is stable, sits level and stays dry.

The new-project wizard →
Shape

Edit the actual geometry

A hull is a grid: transverse stations down the length, seven named longitudinal lines through them. Drag a point, pin an axis, give it a range — and watch all four views agree.

The design lab →
Float

Numbers that come from your shape

Displacement, LCB and LCF, GM, wetted surface, the form coefficients, freeboard fore and aft, and resistance across the speed range — integrated from the mesh you drew, at the trim it settles at.

Reading the numbers →
Improve

Let a solver move the points

A gradient optimiser nudges the control points you leave free to cut resistance at your design speed — while respecting every pin and bound you set. It only ever moves what you did not lock.

Optimiser, fairing & sweeps →
Build

Take it out as a real file

A STEP assembly of named parts, IGES or DXF wireframe, OBJ mesh, a table of offsets and a keel & stem schedule — all generated server-side from the faired surface and mirrored to a full watertight model.

Export, versions & sharing →
Learn

Every term, explained once

Deadrise, prismatic coefficient, LCB, porpoising margin. If a word appears in the app it appears in the glossary, in the sense the app means it — not the sense a textbook means it.

Glossary →

Three panels do the heavy lifting

They sit in the same rail on the right of the design lab, so the hull never leaves the screen while you work on it.

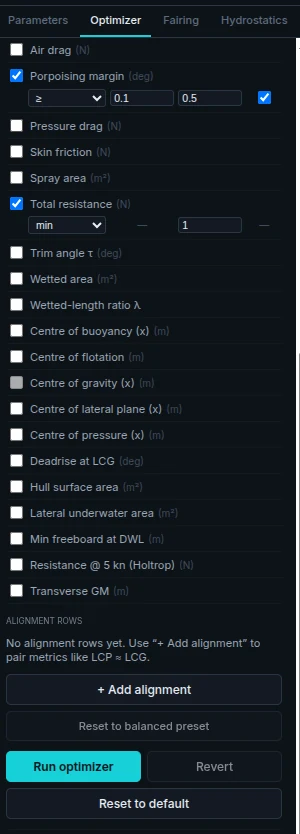
The Optimizer tab: a checklist of metrics — air drag, porpoising margin, pressure drag, skin friction, spray area, total resistance, trim angle, wetted area, the centres, deadrise at LCG, minimum freeboard and transverse GM — with porpoising margin and total resistance ticked, and a Run optimizer button.

Optimizer

Tick the metrics you care about, set each one to minimise, maximise or hold a bound, and run it. Porpoising margin ≥ 0.5° and minimum total resistance is the preset shown here.

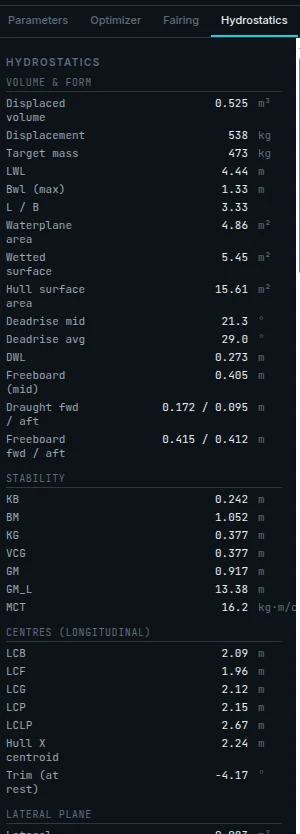
The Hydrostatics tab: displaced volume, displacement, target mass, waterline length and beam, L over B, waterplane and wetted surface area, deadrise, DWL, freeboard and draught fore and aft, then KB, BM, KG, VCG, GM, longitudinal GM and MCT, then the longitudinal centres.

Hydrostatics

Volume and form, stability, the longitudinal centres, the lateral plane. All of it re-integrated from your mesh whenever the shape or the loadout changes.

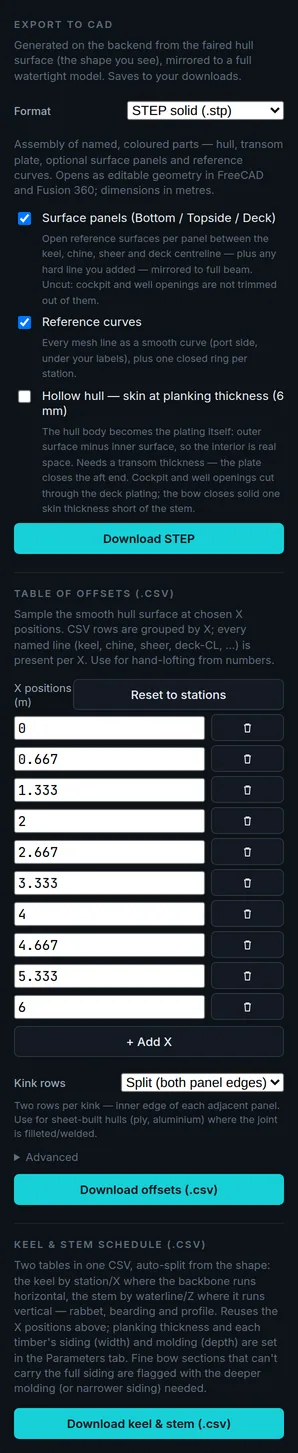
The Export tab: a CAD format picker set to STEP solid, three checkboxes — surface panels and reference curves ticked, hollow hull at planking thickness unticked — a Download STEP button, and below them a table-of-offsets section listing the X positions to sample and a kink-row mode set to split both panel edges.

Export

A STEP assembly of named parts for CAD, or a table of offsets sampled at the X positions you choose — with both edges of every kink, for sheet-built hulls where the joint is filleted or welded.

Every design is a project

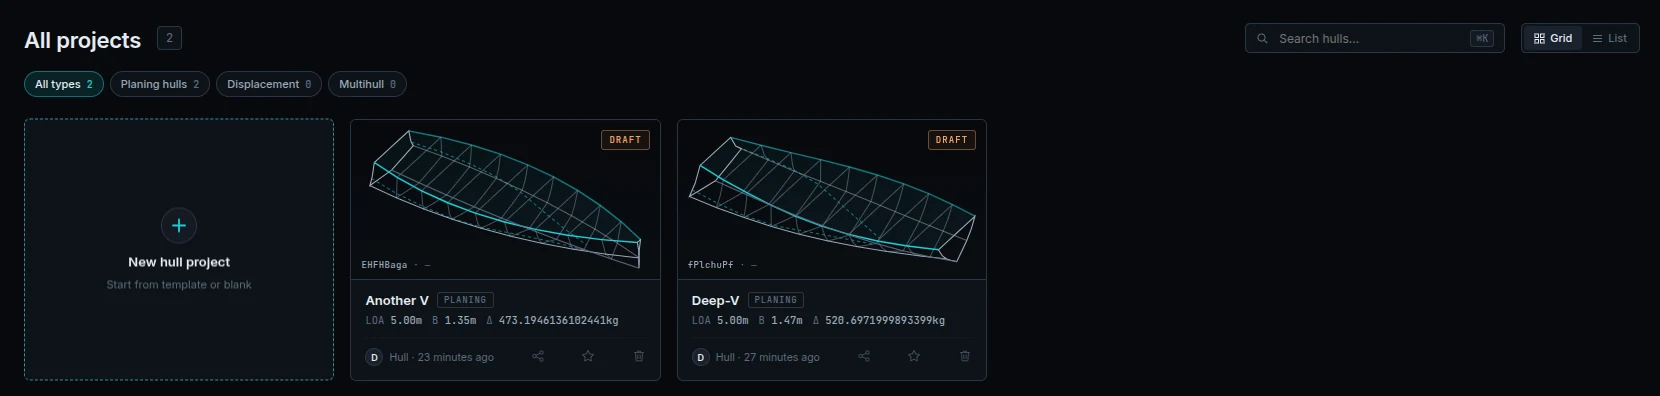
Your library lists what you own, with each card drawn from that design's own saved hull rather than a generic picture — so the thumbnail is the actual boat, to scale, with its waterline. Projects auto-save as you work, can be frozen into numbered versions you can return to, and can be shared with the other people in your workspace.

the projects library
The projects library: a search field and a grid or list toggle, filter chips for all types, planing hulls, displacement and multihull, a New hull project tile, and two project cards each showing a wireframe of its own hull with the length, beam and displacement underneath.
Auto-save Numbered versions Shared workspaces

Hull is in closed beta

We are testing with a small group of boat designers before opening sign-ups. To apply for an invite, email hull@drpira.se and tell us a little about what you would like to design — the boat, not a CV. We reply with a personal link that creates your account.

Curious first? The whole manual is public, including the plan limits and the honest caveats.